Why your first layer will not stick
Quick answer
Most first-layer failures trace to one of three causes: a plate contaminated with skin oil, a nozzle sitting at the wrong height, or a bed temperature below what the material needs. PLA needs 60C, PETG needs 80C, and ABS or ASA needs 100C to bond on the first pass.
The bed temperatures below are published material figures, while the cleaning and Z offset steps are standard troubleshooting convention rather than a single manufacturer procedure.
What does a failed first layer actually look like?
A failed first layer shows up a few different ways, and which one you see points to a different cause. The filament might not touch down at all, dragging in loose strands behind the nozzle instead of laying flat. A layer might lay down fine in the center of the bed but peel up at one or more corners while the rest holds. Or the first layer might look thin, see-through, and barely attached, only to pop free entirely a few layers into the print once the part gets tall enough to catch on the nozzle or a draft.
Each of these points somewhere specific. Total refusal to stick almost always means temperature or a contaminated plate. A single corner lifting while the rest holds is usually a leveling or warping issue rather than a global adhesion problem. A layer that looked fine at first but let go later is often a case where the bond was marginal from the start and something, a draft, a slightly cooler room, or vibration, finished the job.
Is it a dirty plate, the wrong temperature, or a bad Z offset?
These three causes cover the large majority of first-layer failures, and they are worth checking in a specific order because each one is faster to rule out than the last. Start with plate cleanliness, since it costs nothing and takes a minute. Then confirm the bed is actually at the temperature the material needs. Only after both of those check out is it worth measuring and adjusting Z offset, which takes longer and risks a crashed nozzle if done carelessly.
Skipping straight to a Z offset change is the most common mistake here. A dirty plate or a cold bed will make any Z offset look wrong, because the symptoms overlap: patchy adhesion, corners lifting, a layer that looks under-squished. Chasing offset first often means re-doing the adjustment later once the real cause turns up.
Why did my plate stop working when nothing in my settings changed?
Plate contamination from skin oils is the single most common cause of adhesion that gets suddenly worse for no apparent reason. Every time a finished print or a bare hand touches the plate, a thin film of oil is left behind. That film builds up gradually across many prints, so the failure feels sudden even though the cause was accumulating the whole time. By the time adhesion actually fails, the plate has usually been quietly degrading for a while.
The fix is simple and should be the first thing tried whenever a plate that used to work suddenly does not: wash it with warm soapy water and a lint-free cloth, or wipe it down with isopropyl alcohol, then let it dry fully before printing. Avoid touching the print surface with bare fingers afterward. If a clean plate still will not hold a print, move on to checking temperature and offset rather than assuming the plate itself is worn out.
What bed temperature does my filament actually need?
Every common filament has a bed temperature range it needs for the first layer to bond at all, and printing below that range is one of the most common reasons for a first layer that will not stick even on a perfectly clean plate. The figures below are the first-layer targets to start from.
These are starting points from published material data, not fixed rules; a specific spool or a specific plate surface may need a few degrees more. If a print will not stick at the number below, try raising bed temperature in small steps before assuming the problem is mechanical.
- PLA: 60C
- PETG: 80C
- ABS and ASA: 100C
- TPU: 50C
- Nylon: 80C
- PC: 110C
How do I set Z offset without guessing at it?
The reliable way to set Z offset is to measure, not guess. Print a single-layer test patch, let it cool, and measure its thickness with a digital caliper. Subtract the layer height you told the slicer to use, target thickness, from the measured thickness. That difference is how far off the nozzle height is, and the sign tells you which direction to move it.
On most machines, making the offset more negative lowers the nozzle and a more positive offset raises it, but a handful of firmware setups invert that convention. Before making a large change based on a calculation, adjust the offset by a small step, 0.02mm is a reasonable amount, print a test patch, and confirm the thickness actually moved in the direction expected. Once the direction is confirmed, the rest of the adjustment is just arithmetic.
Why does PETG stick too well and then tear my plate?
PETG is the one material where the usual advice about adhesives gets flipped. PETG bonds chemically to bare, uncoated PEI, strongly enough that pulling a finished print off can tear the surface coating off the plate rather than releasing cleanly. This is a chemical bond, not just mechanical grip, and it is a different failure mode from everything else in this guide: the print is not failing to stick, it is sticking too well to the plate itself.
A thin layer of glue stick on bare PEI solves this, but not for the reason it solves other adhesion problems. On PLA or ABS, glue stick works as an adhesive, adding grip that the bare plate lacks. On PETG over bare PEI, it works as a release agent instead: it sits between the print and the plate and prevents the chemical bond from forming, while still leaving enough grip to hold the first layer down during printing. Understanding that distinction avoids the mistake of skipping glue stick on PETG because "PETG already sticks fine," which is exactly the situation that risks the plate.
| Material | First-layer bed temp | Note |
|---|---|---|
| PLA | 60C | Usually the most forgiving material for adhesion |
| PETG | 80C | Bonds chemically to bare PEI; use glue stick as a release agent |
| ABS / ASA | 100C | Warping is more often an environment problem than a bed problem |
| TPU | 50C | Low bed temp; adhesion problems here are more often speed-related |
| Nylon | 80C | Also the fastest of these materials to absorb moisture |
| PC | 110C | Highest bed temp of this group; confirm the plate is rated for it |
Equipment mentioned here
- Geeetech
Geeetech 6-Pack 3D Printer Glue Sticks, 36g, Enhanced First Layer Adhesion
$11.99 Check pricePrices change often - HENYCEE
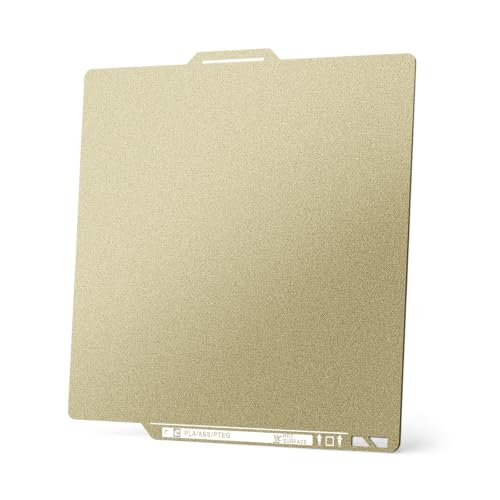
HENYCEE PEI Build Plate for Bambu Lab X2D/P2S/X1/X1C/X1E/P1P/P1S/A1
$16.99 Check pricePrices change often




Safety
Common questions
What is the first thing to check when a first layer will not stick?
Check plate cleanliness first, since it takes a minute and costs nothing. Wash the plate with warm soapy water or wipe it with isopropyl alcohol and let it dry fully. Skin oils build up gradually and are the most common cause of adhesion that fails suddenly, even though nothing in the slicer settings changed.
Will adding more glue fix a first layer that will not stick?
Only sometimes. More glue helps when the plate genuinely lacks grip, such as with ABS on a slick surface. It does not help if the real cause is a bed that is too cold for the material or a nozzle sitting too high. Fix temperature and Z offset first, then decide if an adhesive is still needed.
Why does my print stick in the center but lift at the corners?
This is typically a bed leveling issue rather than a global adhesion problem. If the bed is slightly higher in the middle than at the corners, the corners get less squish and hold on more weakly. Re-level the bed and, if available, run an automatic bed mesh rather than relying on a single Z offset for the whole plate.
How often should I clean my build plate?
Clean it whenever a print is removed by hand or whenever adhesion starts feeling less reliable than usual, since oil contamination builds up gradually rather than all at once. Many owners wipe the plate down every few prints as routine maintenance rather than waiting for a failure to force the issue.
Do I need a brim or raft if the first layer keeps failing?
A brim or raft can buy extra hold for a print with a small footprint or corners prone to lifting, but it treats the symptom, not the cause. Fix plate cleanliness, bed temperature, and Z offset first; add a brim as extra insurance on a genuinely difficult part, not as a permanent workaround for an adhesion problem that has a real fix.